Introduction
AllegroGraph has long used the AGWebView interface, described in the Traditional WebView document. AllegroGraph 8.1.1 introduces a new implementation with a new look and feel, described in this document.
New WebView is what is displayed when AllegroGraph starts up. If you would rather use Traditional WebView, you can switch to it in the Login dialog displayed below. If you are already logged in, you can open a Traditional WebView tab by clicking on the Traditional WebView choice in the menu on the left side of the New WebView page.
If you are using Traditional WebView, you get the new version by clicking New WebView on the right in the banner of the traditional WebView page:

Login dialog
When New WebView is started you are presented with a login window:
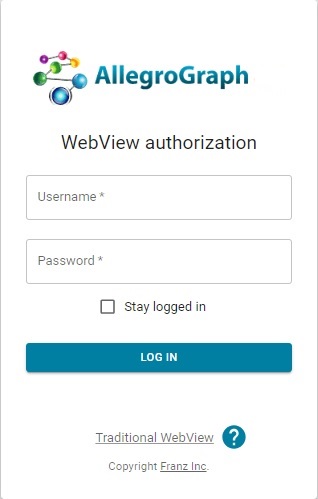
Supply your AllegroGraph username and password (or token). WebView will log you out if you are idle too long (30 minutes), but check the Stay logged in checkbox if desired to allow 30 days until being logged out.
If you prefer Traditional WebView, go there directly (without logging in) with the Traditional WebView link near the bottom.
Initial Display
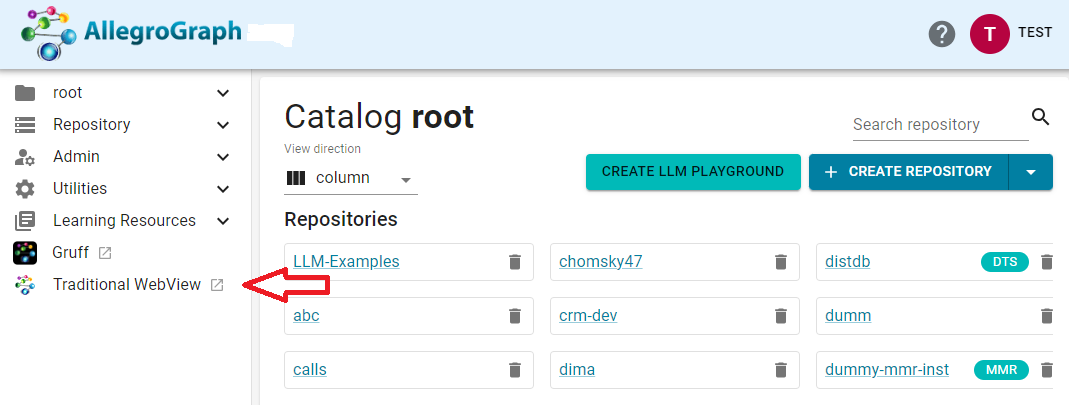
Here is the New WebView page when it starts up (the first time, there will be no repositories shown, but this image comes after some use):
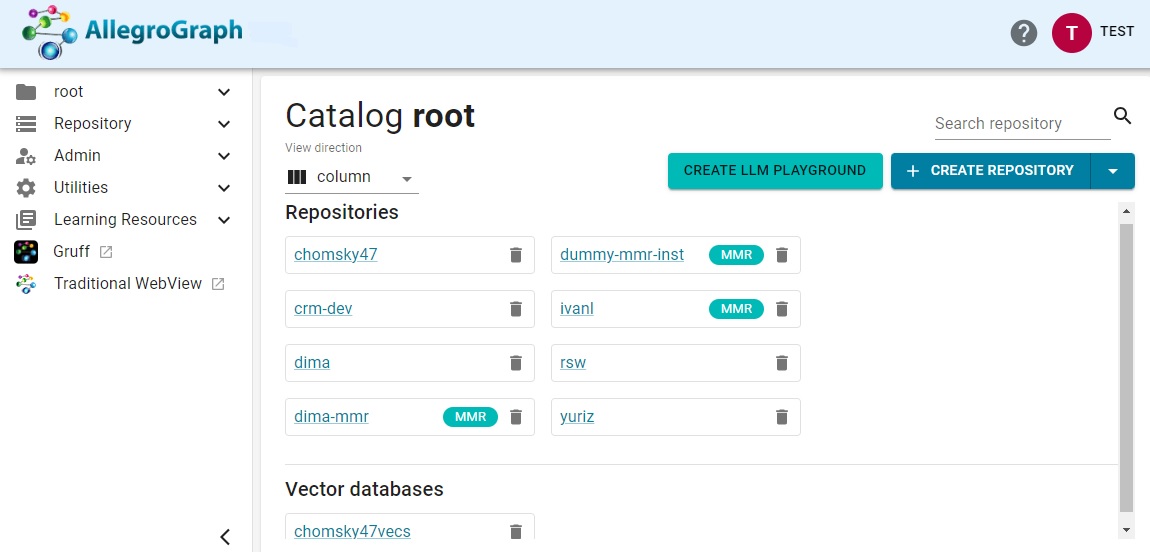
The exact contents depend on how New WebView was initiated and characteristics and permissions of the user. Always displayed are the banner at the top and a menu list to the left. When first displayed, the main field in the center displays the repositories in the current catalog and some action buttons. Note that what works and sometimes what is displayed depends on the permissions of the current user. If the current user does not have permission to perform a certain action, that fact may be reported on the page or when the users attempts the action. Most pictures are taked when the user had superuser permission, so most illustrations in the document do not show restrictions.
The Banner
The banner, at the top of a New WebView page, is always displayed. It has three active items:
The AllegroGraph logo. Clicking on this returns to the catalog/repo page.
A ? icon: when clicked, displays a menu with choices version information and links to the documentation on the franz.com website.
A person outline icon and the current user name. These are a single active region displaying when clicked a menu of some display preferences and other actions. Warning: one of the choices is Delete. If chosen and confirmed, the current user is deleted from the system and the screen changes to a login prompt. Do not do this unless it is what you want to do.
As you navigate among the various New WebView pages, you can always get back to the catalog/repo initial page by clicking on the AllegroGraph logo on the left in the banner.
The repository page
As said, New WebView typically opens to a page listing repositories in the current catalog (usually the root catalog). Along the top to the right are button for creating a new repository in the current catalog and a button for creating an Large Language Model playground (which also creates a new repo). See the llm document for information on the llm playground.
A search widget appears on the upper right, useful when there are very many repos.
The Menus
On the left are a list of applicable menus. The list depends on the permissions of the user. For example, if the user is a superuser, one of the choices will be Admin. The arrowhead next to the menu name points down if the menu is closed and up if open. Clicking on the menu name or arrowhead changes the state.
How to use the various menu items is usually clear once the menu is displayed so we will not go into too much detail in the document.
The catalog list
Catalogs are listed under the file folder icon to the left just under the AllegroGraph icon. There is always a root and a fedshard catalog. Other catalogs must be defined by you (our your administrator) and listed in a agraph.cfg configuration file (see the Server Configuration and Control document). Clicking on a catalog name displays the repositories (also called repos) in the catalog.
The Repository Menu
The Repository menu is only active when a repo is open. Click on an existing repo listed on the page or the Create Repository box to create a new one. (Its drop down menu also allows restoring a repo from a backup file.)
Once a repo is open and the menu is live, you will see these items:
- Query: This important page allows executing queries and seeing results. Here it is after having run a query. The query shown is a useful one if you use triple attributes as it shows triples and their attributes:
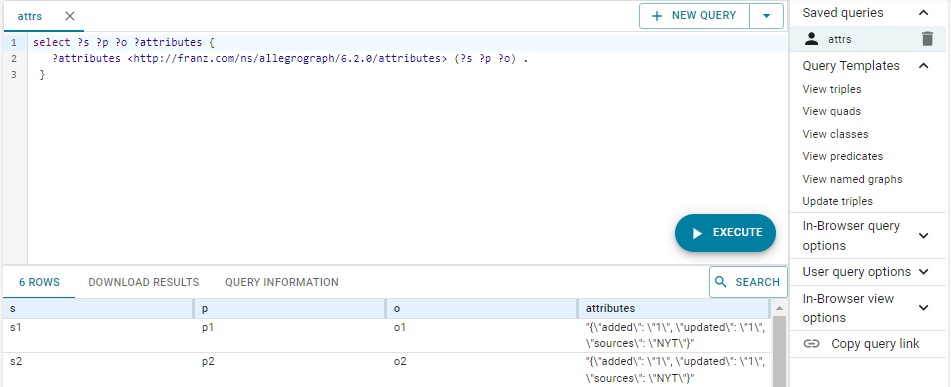
Note the user in this case thinks this query so convenient that it was saved (named attrs over on the right). We repeat it to make it easy to cut and paste if desired:
select ?s ?p ?o ?attributes {
   ?attributes <http://franz.com/ns/allegrograph/6.2.0/attributes> (?s ?p ?o) .
 }
Recent queries are listed along the top, and a selection of useful queries are listed on the right, including View triples which displays all triples (up to the specified display limit) in a repo. The display limit, on by default, is 1000, set in the In Browser Query Options to the right. See below for more information on the query page.
Add, delete, and import data: Lists the various ways triples can be added or deleted, with links.
Namespaces: Lists available namespaces. See the Namespaces and query options document for more information.
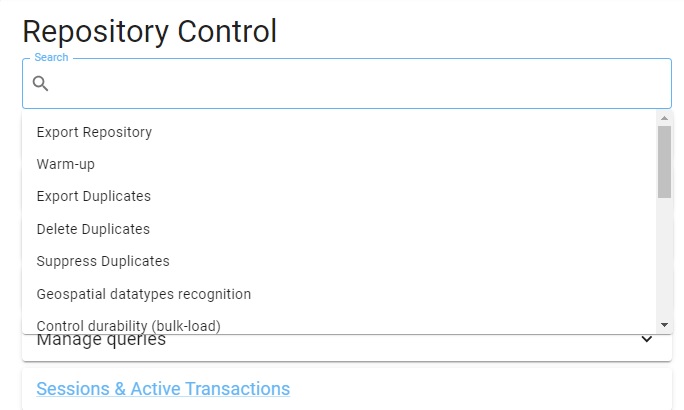
Repository Control: One of the most important repo menu choices. It displays a number of repo-related commands, and there is a Search box for finding additional commands (clicking in it drops down a menu of choices, as shown, while typing in the box displays relevant choices based on what you type).
Storage overview: Displays graphs on storage usage by AllegroGraph.
Session: Displays information about sessions and presents a menu of actions like commit, rollback, or close. If no session is running has a button to create a basic new one and a link to a page allowing more complex sessions to be created.
Scripts: This link displays the Server Scripting page. Only users with Eval permission can write and run a script (see the Evaluate Arbitrary Code user permission in the General permissions section of the Managing Users document for information on Eval access).
More on the Query page
As said above, queries can be saved. Recent queries are listed at the top of the page but these will go away unless saved (when for example, the page is reloaded).
If you hover over the Execute Button, two additional choices appear: Plan and Log. Click on Plan to see the query plan (what the system intends to do when executing the query). The plan will also display warnings if there are any. Log will cause the query ro be logged.
The Admin menu
This menu is only visible to superusers. It has the following items:
- Users: Please see the Managing Users document for further information. The AGWebView interface for controlling users (and also roles) is described in detail in that document along with the equivalent agtool users and agtool roles commands.
- Jobs: Lists running jobs. Most users do not have the necessary permissions to see the list, however.
- Requests: List of system requests. Usually useful only when there is a problem.
- Audit log: See the audit doc.
- View server log: Displays the server log.
- View and edit initfile: Changes are seen by new sessions.
- Process list: lists all running processes, providing information about them and with buttons for killing, telneting into, and the like.
- View server configuration: shows the contents of the agraph.cfg configuration file.
- View cluster configuration: if the server is part of a configuration, shows information about it. Grayed out if the server is not part of a configuration.
- WebView versions: notes the current WebView version and allows checking for newer versions.
The Utilities menu
Available to all users
- Sessions: Displays a page listing sessions and provides a link to a page allowing creation of complex sessions.
- Server stats: Displays a page of server utilization graphs. These are very useful for, among other things, seeing the space and computation resources used by a complex query.
- Geospatial datatype designer: opens the Geospatial Datatype Designer page (see the WebView Geospatial Datatype Designer section in the N-dimensional Geospatial Usage Guide and Example document.
Other items
Learning Resources: A menu with various helpful links, such as Documentation, Examples, and Python Tutorials.
Gruff: Open Gruff
Old WebView: Open a traditional WebView browser tab.
Miscellaneous Tasks (managing query options, exporting or backing up triples from a repo, backing up everything)
You can do most everything necessary with some command somewhere in New WebView, but it may not always be easy to find the right menu or the right choice. In this section we show how to accomplish certain common tasks. Even if the task you are looking for is not here, showing how commands for these tasks are found may assist in finding what you are looking for.
Managing Query options
The predefined query options are listed in SPARQL Query Options section of the SPARQL Reference document. A query option is enabled with a PREFIX to the query of the following form:
PREFIX franzOption_optionName: <franz:optionValue> where optionName names the option and optionValue specifies the option value. For example, the PREFIX, with optionName logQuery and optionValue onFailure specifies that query execution details should be logged only when the query fails:
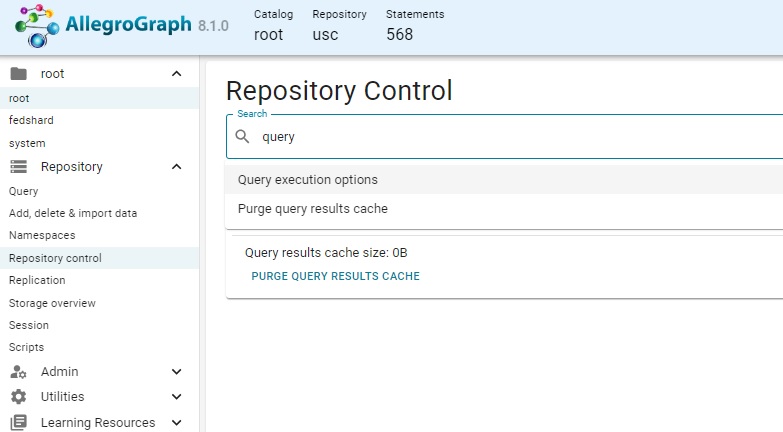
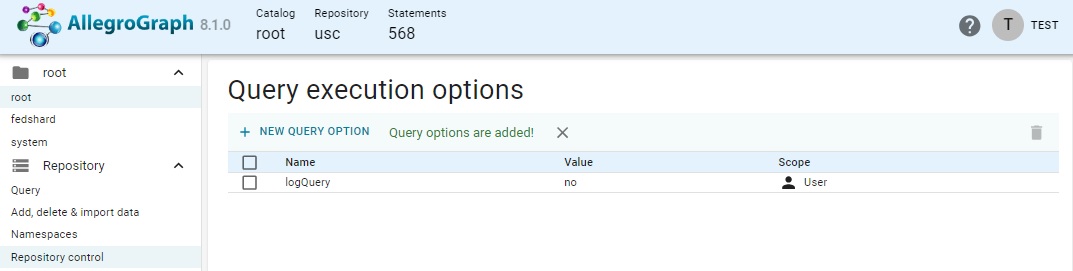
PREFIX franzOption_logQuery: <franz:onFailure> You can view and manage currently enabled query options for a repo on the Query execution options page. This page is displayed by that option on the Repository control menu displayed by clicking Repository control on the Repository menu displayed on the left of the screen and searching for Query in the search box which is displayed.
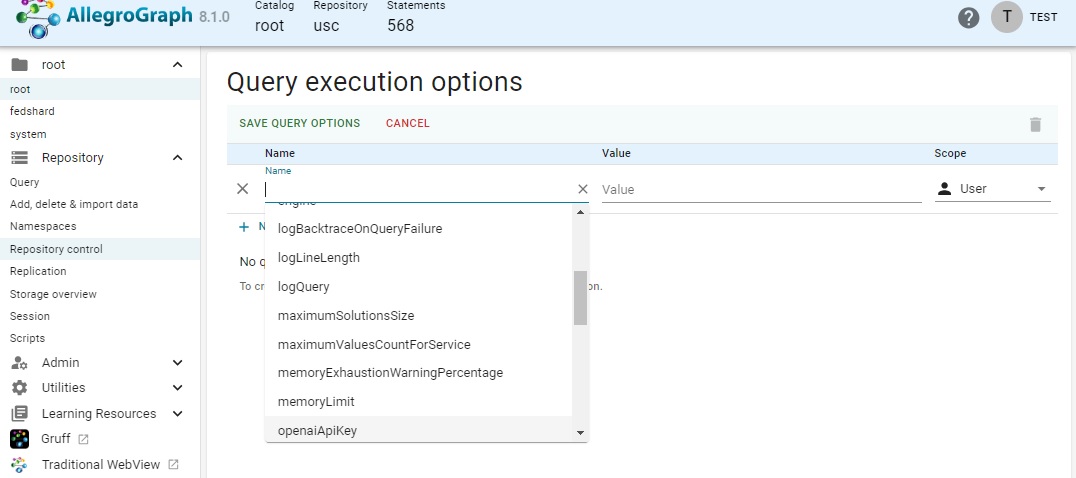
That displays a page that displays existing options (there are none in our illustration) and allows adding new ones. Clicking on New query options displays a from to add an option. The Name field has a drop down menu (as shown) with defined options:
And when a name is chosen, the Value field also has a menu of choices (if relevant -- sometimes you must specify the choice):
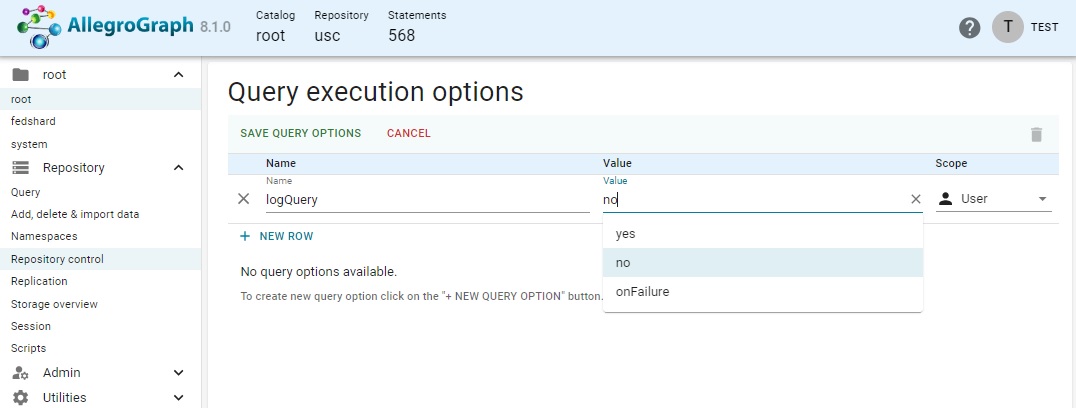
You can also specify the scope: for you, the user; for this repo; or for all queries.
Once the values are chosen, clicking SAVE QUERY OPTIONS adds the option.
Exporting or backing up triples from a repo
Exporting data from a repo means writing a single file of a specified format (such as Ntriples or Nquads, and serval others) suitable for loading in any version of AllegroGraph or indeed any RDF database program. Backing up data means writing all data associated with a repo to a specialized file or files suitable to be read into AllegroGraph (or the same or later version than the one backed up).
Exporting data to a file
Display the Repository control menu and enter export in the search box.
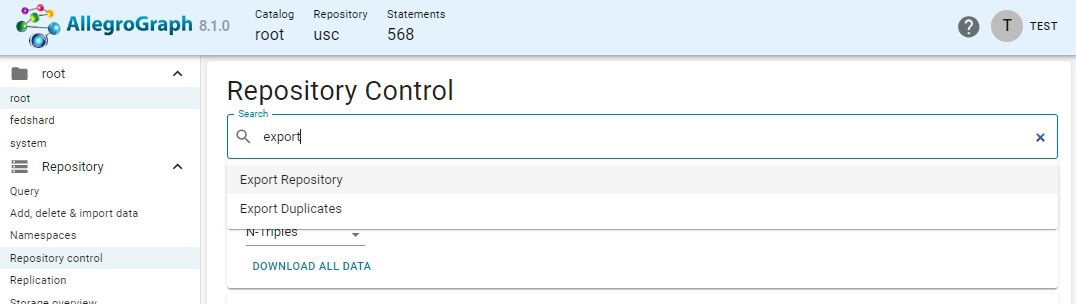
Choose Export repository. This actually takes you to the Archiving choice, with the portion for downloading data displayed.
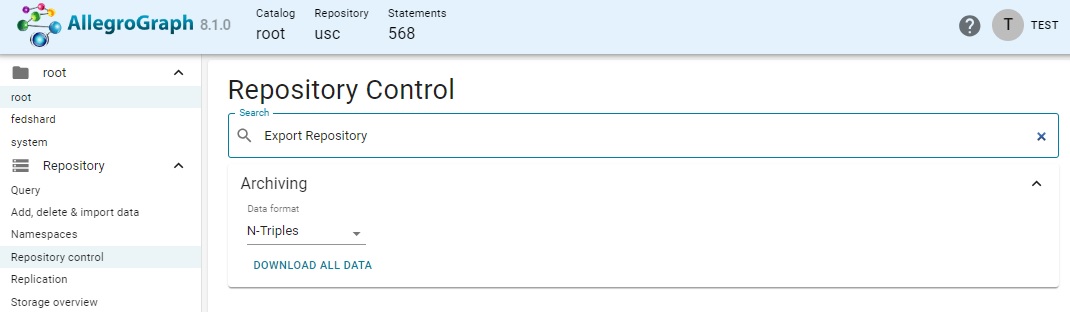
There is a drop down menu for specifying the file type (we have chosen N-Triples) and a DOWNLOAD ALL DATA button. Clicking it displays a file dialog allowing you to specify a filename and location.
Backing up a repo
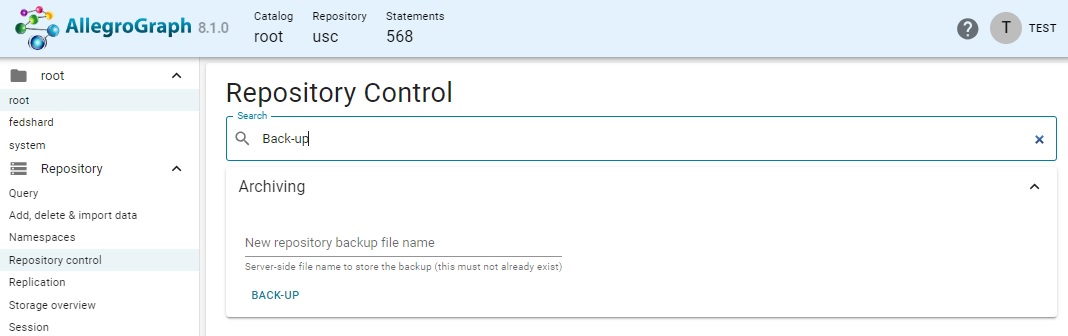
Searching for back-up displays the portion of the Archiving page that applies to backing a repo up. You have to specify a new name (not already used) for the back-up files and click "BACK-UP" (the location is part of the AllegroGraph directory).
Backing up everything
There is no WebView command to back up all repos at once. To do that, use agtool, as described in Repository Backup and Restore.
LLM support
As said above, WebView supports creating LLM Playgrounds repositories. These repos have suitable prefixes applied to every query, such as one containing the openaiApiKey query option. This tool is described in the LLM document. However, LLM tools and magic predicates are available in any repository. Playgrounds just provide some prefixes automatically.
Other tools specify embeddings used in LLM work. The following subsections describe the relevant tools in New WebView.
LLM embedding specification
LLM embedding is described in the LLM Embed Specification document. Such specifications are used when a vector dababase is created. The specification can be defined using a .def file (as is done with the the historical figures example and the Chomsky47 example. They can also be defined directly with the Create LLM Embedding dialog in New AGWebView, as we describe in this section.
Let's start with the .def file used in the historical figures example (the api-key is not valid).
gpt
 embedder openai
 if-exists supersede
 api-key "sk-U43SY1234567NSGmxlYbT3BlbkFJjyQVFiP5hAR7jKLMnopq"
 vector-database-name ":10700/historicalFigures-vec"
 if-exists supersede
 limit 1000000
 splitter list
 include-predicates <http://www.w3.org/2000/01/rdf-schema\#label>
and let us see how to provide this same information using the Create LLM Embedding dialog in New AGWebView, displayed when Create LLM Embedding is selected in the Repository Control menu displayed when a suitable database is open.

Here are the fields, many of which are optional. Note that a field may become required depending on values of other fields.
New or existent Vector Database: the name of a new vector database, which will then be created, or an existing one, which will either be modified or replaced, according to the value of the next entry.
If databse exists: default is open (meaning add to its contents). Other choice is supersede meaning delete the existing database and open a create one with the same name. If the named database does not exist, open and supersede mean the same: create a new vector database. Equivalent to the
if-existsline in the .def file.Limit the number of strings to index: the value should be a positive integer and can be omitted if you don't want to limit number of strings to embed. A value will restrict the number of index items. Equivalent to the
limitline in the .def file.
The next line (Fill "Embedder", "Model", and "API key" only if you want to create the Vector Database:) is only relevant if a new database is being created, either because the named database does not exist or is being superseded.
Embedder: the type of embedded to use,
openaiordemo.demois not a real embedder but just there for testing.openaiis the only actual embedder available at this time (other may be added and it is possible that they will become available faster than this documentation is updated, but any new ones will be listed in the drop down menu). Equivalent to theembedderline in the .def file.Model: a drop-down menu shows the suitable models based on the choice of embedder. There may be only one. Equivalent to the
modelline which can be in the .def file (though not in the example shown).API key: put in your key of LLM provider (for example OpenAI). Keep in mind that keys typically give access to a server which costs money, so be careful who can see you key and be aware that the key is written to the new vector database. That means that users with access to the vector database have access to API key too. Equivalent to the
api-keyline in the .def file.
The last entries allows specifying predicates and types you wish to include. The include fields default to <*>/*, meaning all predicates/types and the exclude fields default to none. You can specify exactly what to include and exclude with the right combination of include and exclude specifications, using wildcards where convenient.